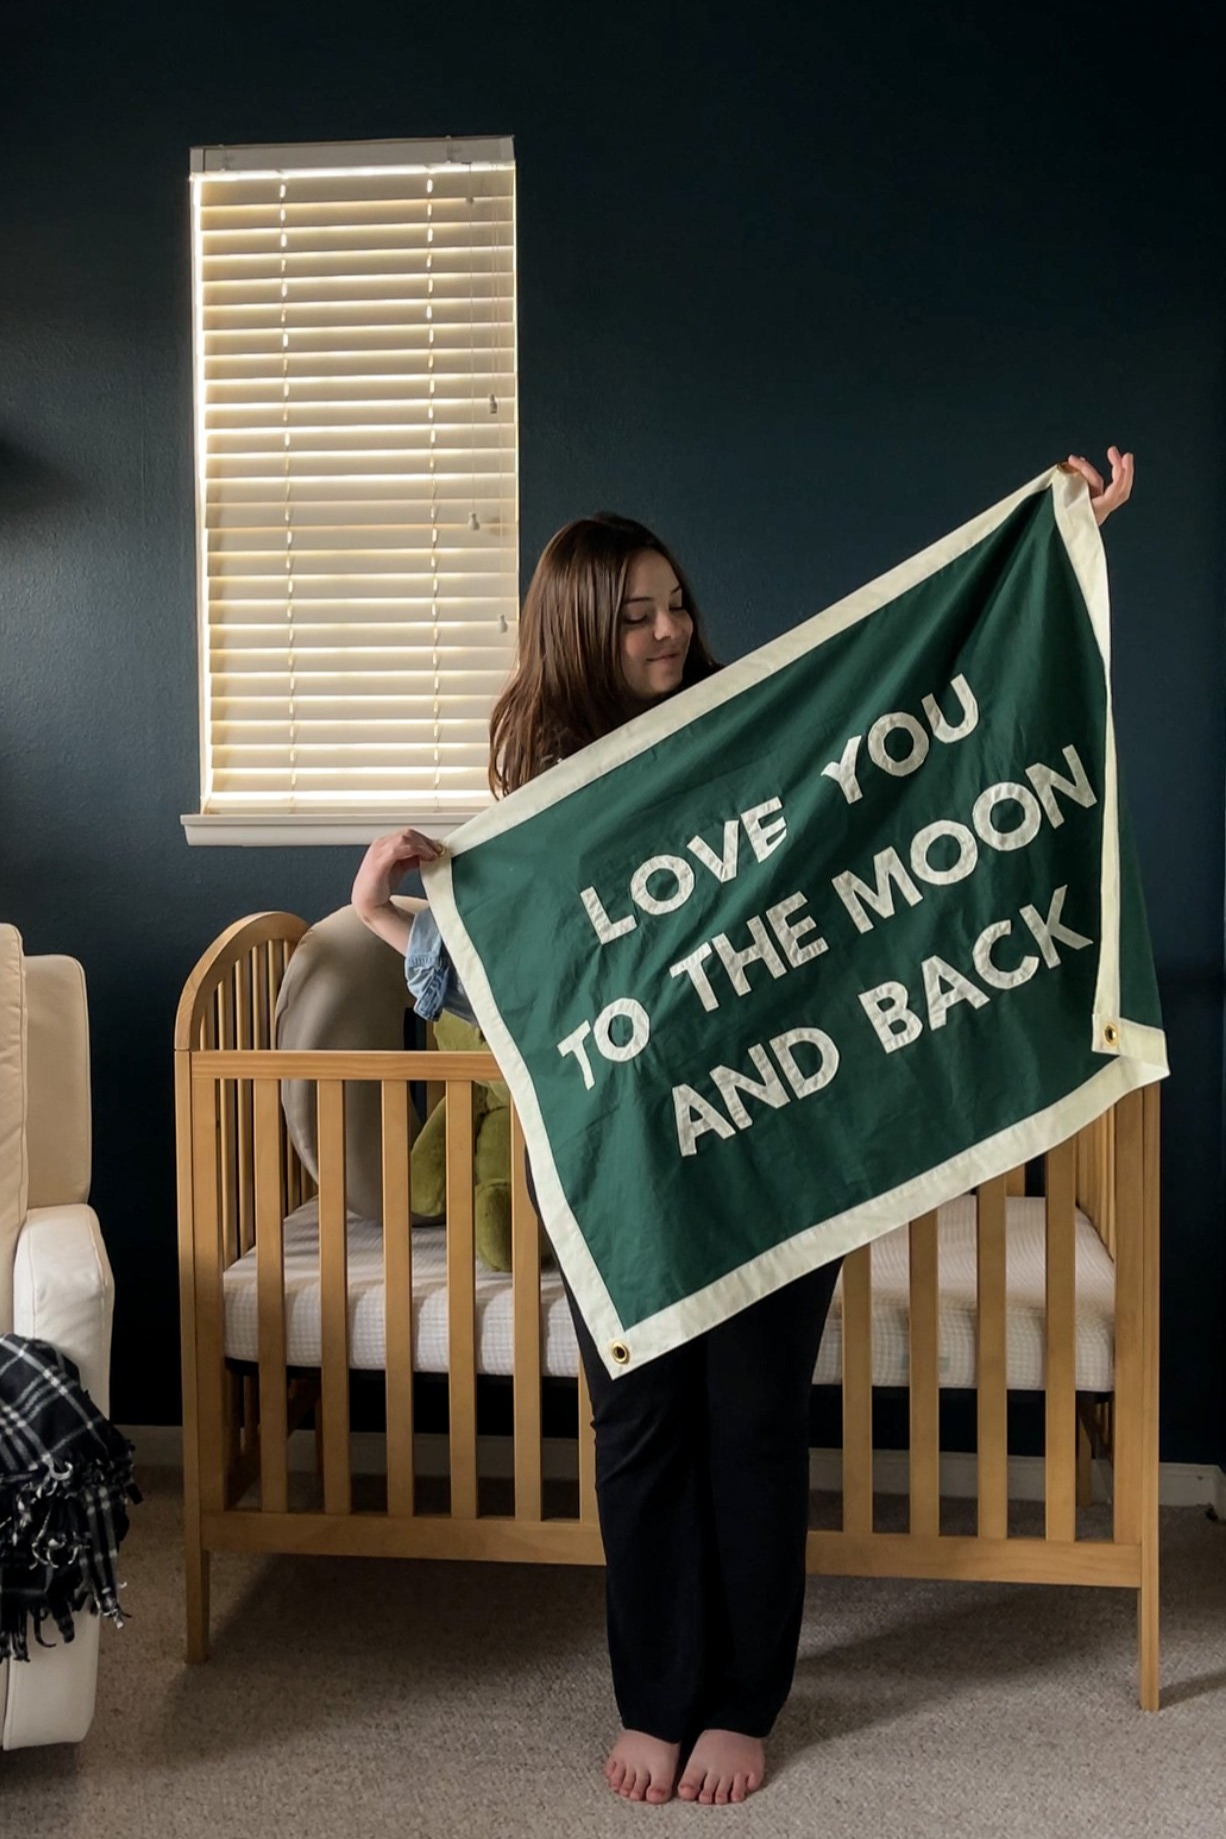
Moon and Back Flag DIY
This was such a simple sewing project that ended up looking really nice and professional (in my opinion, hah!) and I still love seeing it hang on the wall, two years later.
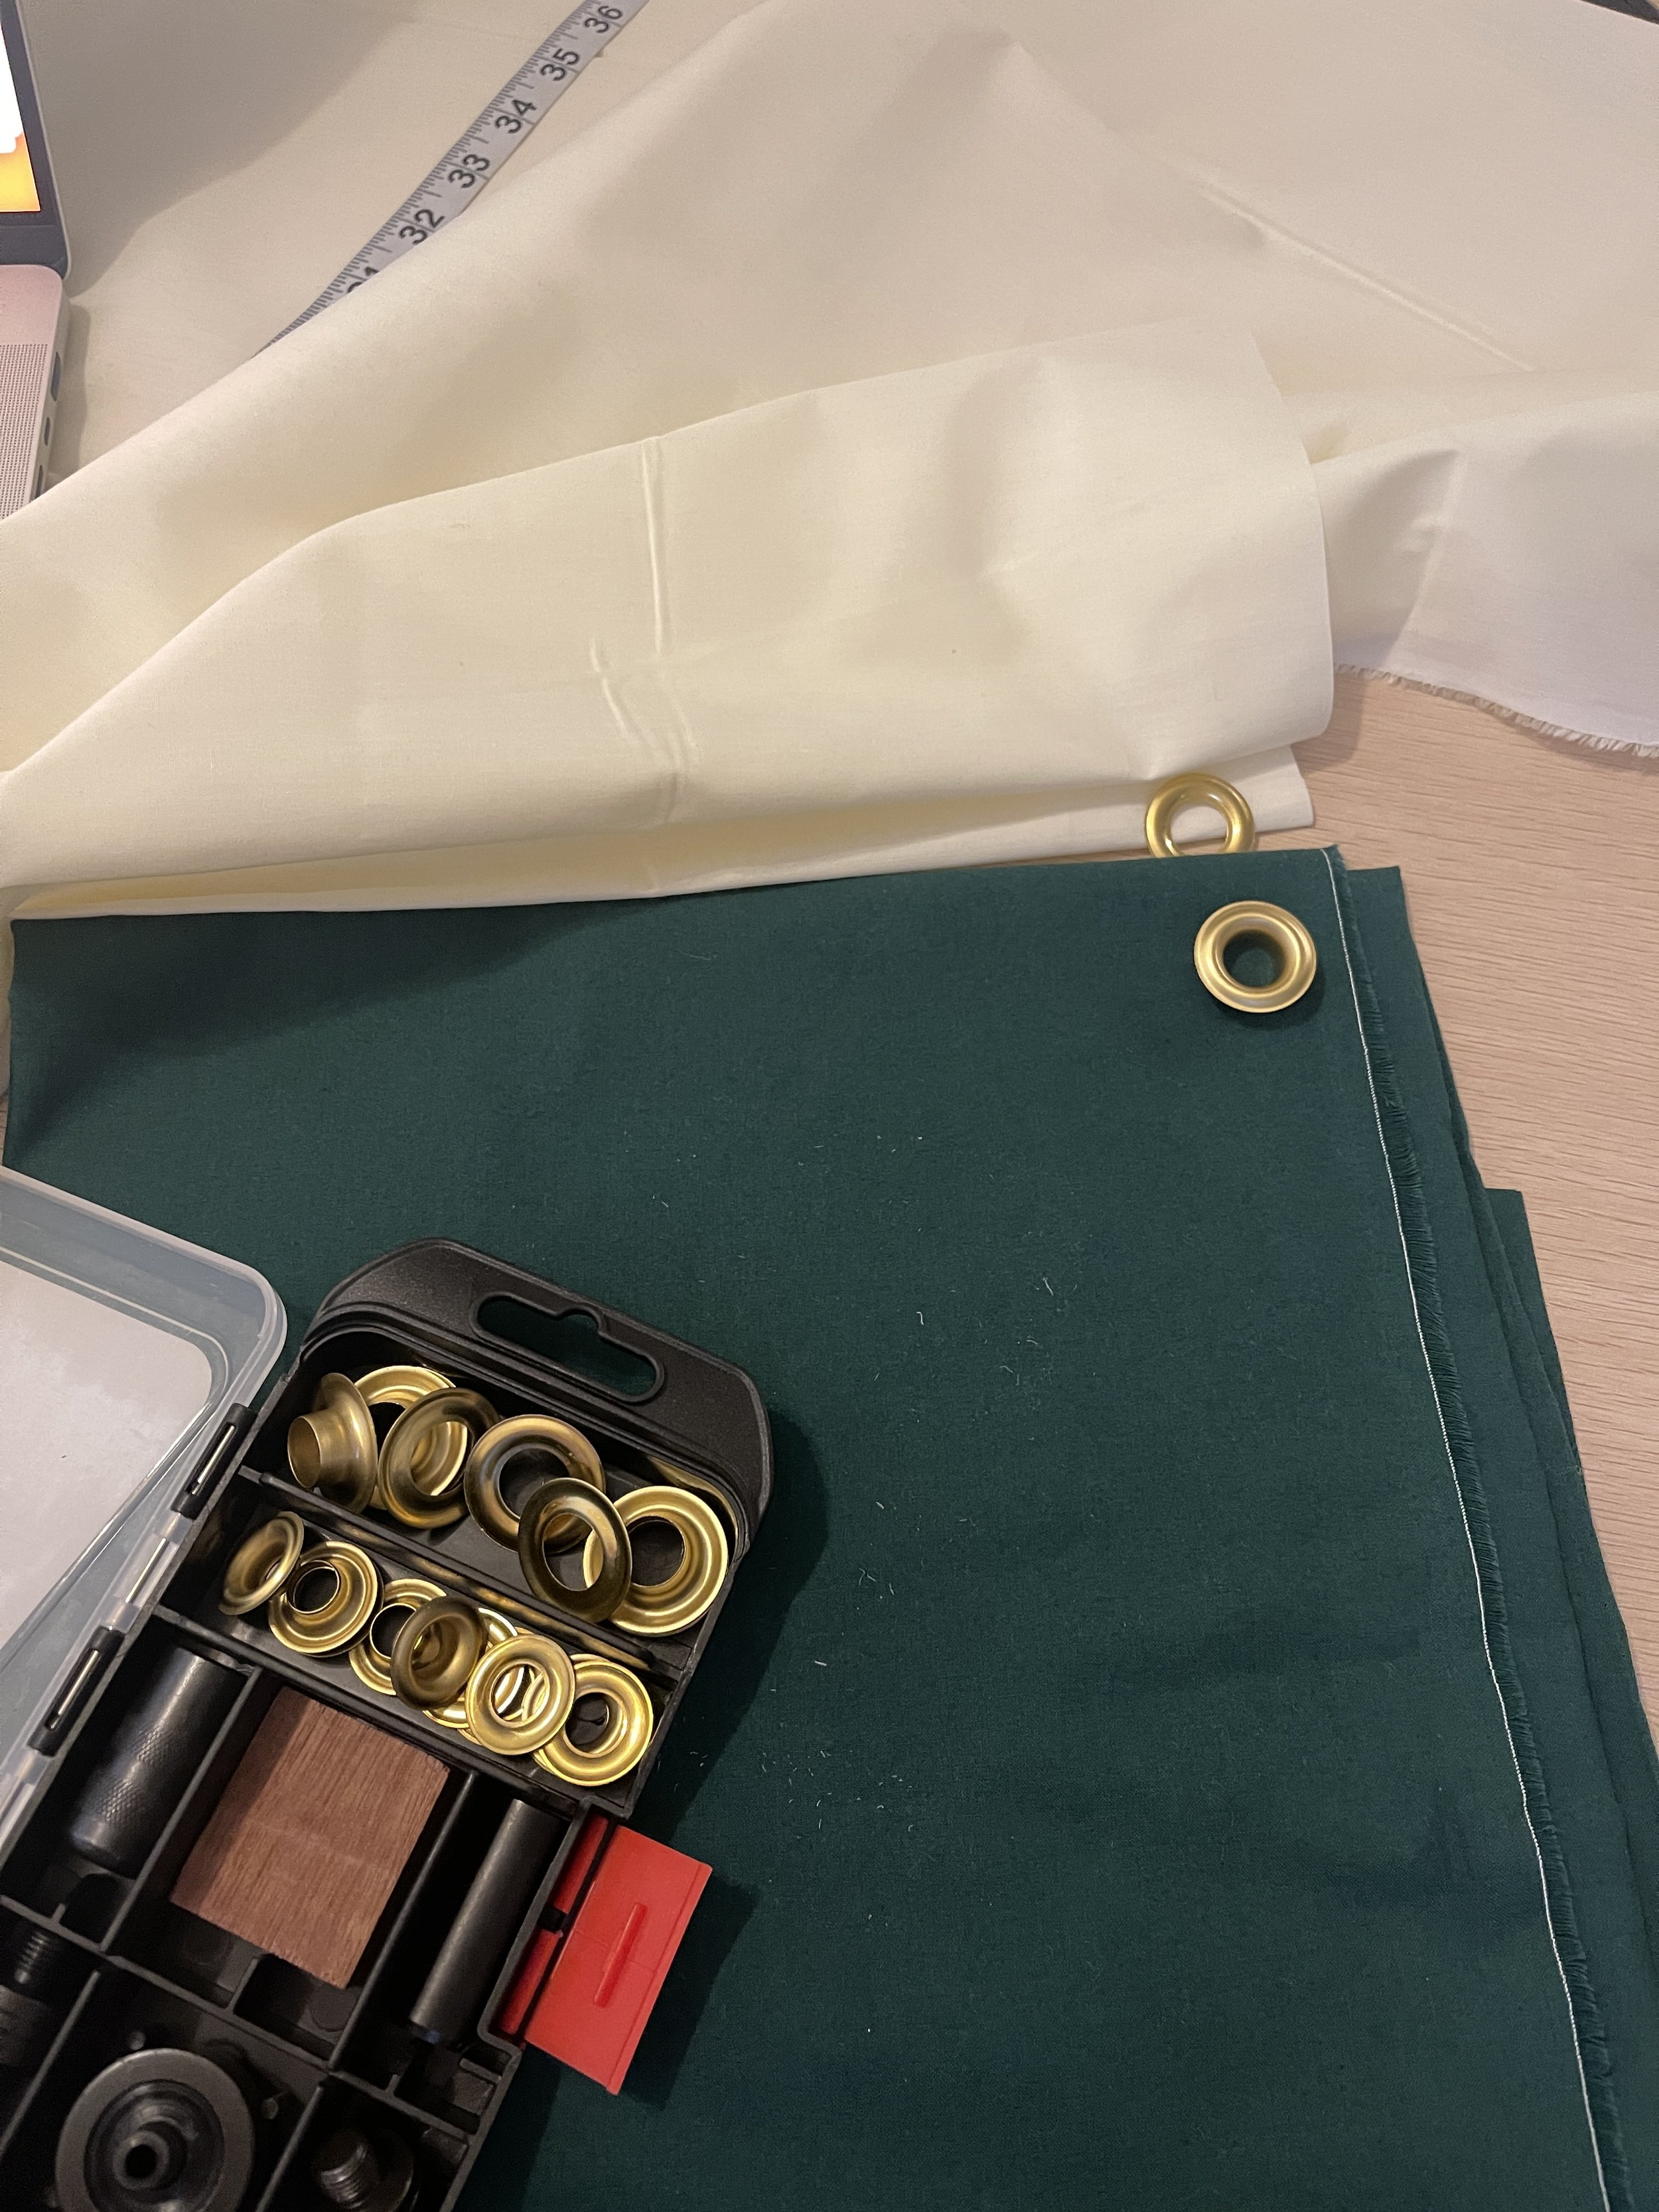
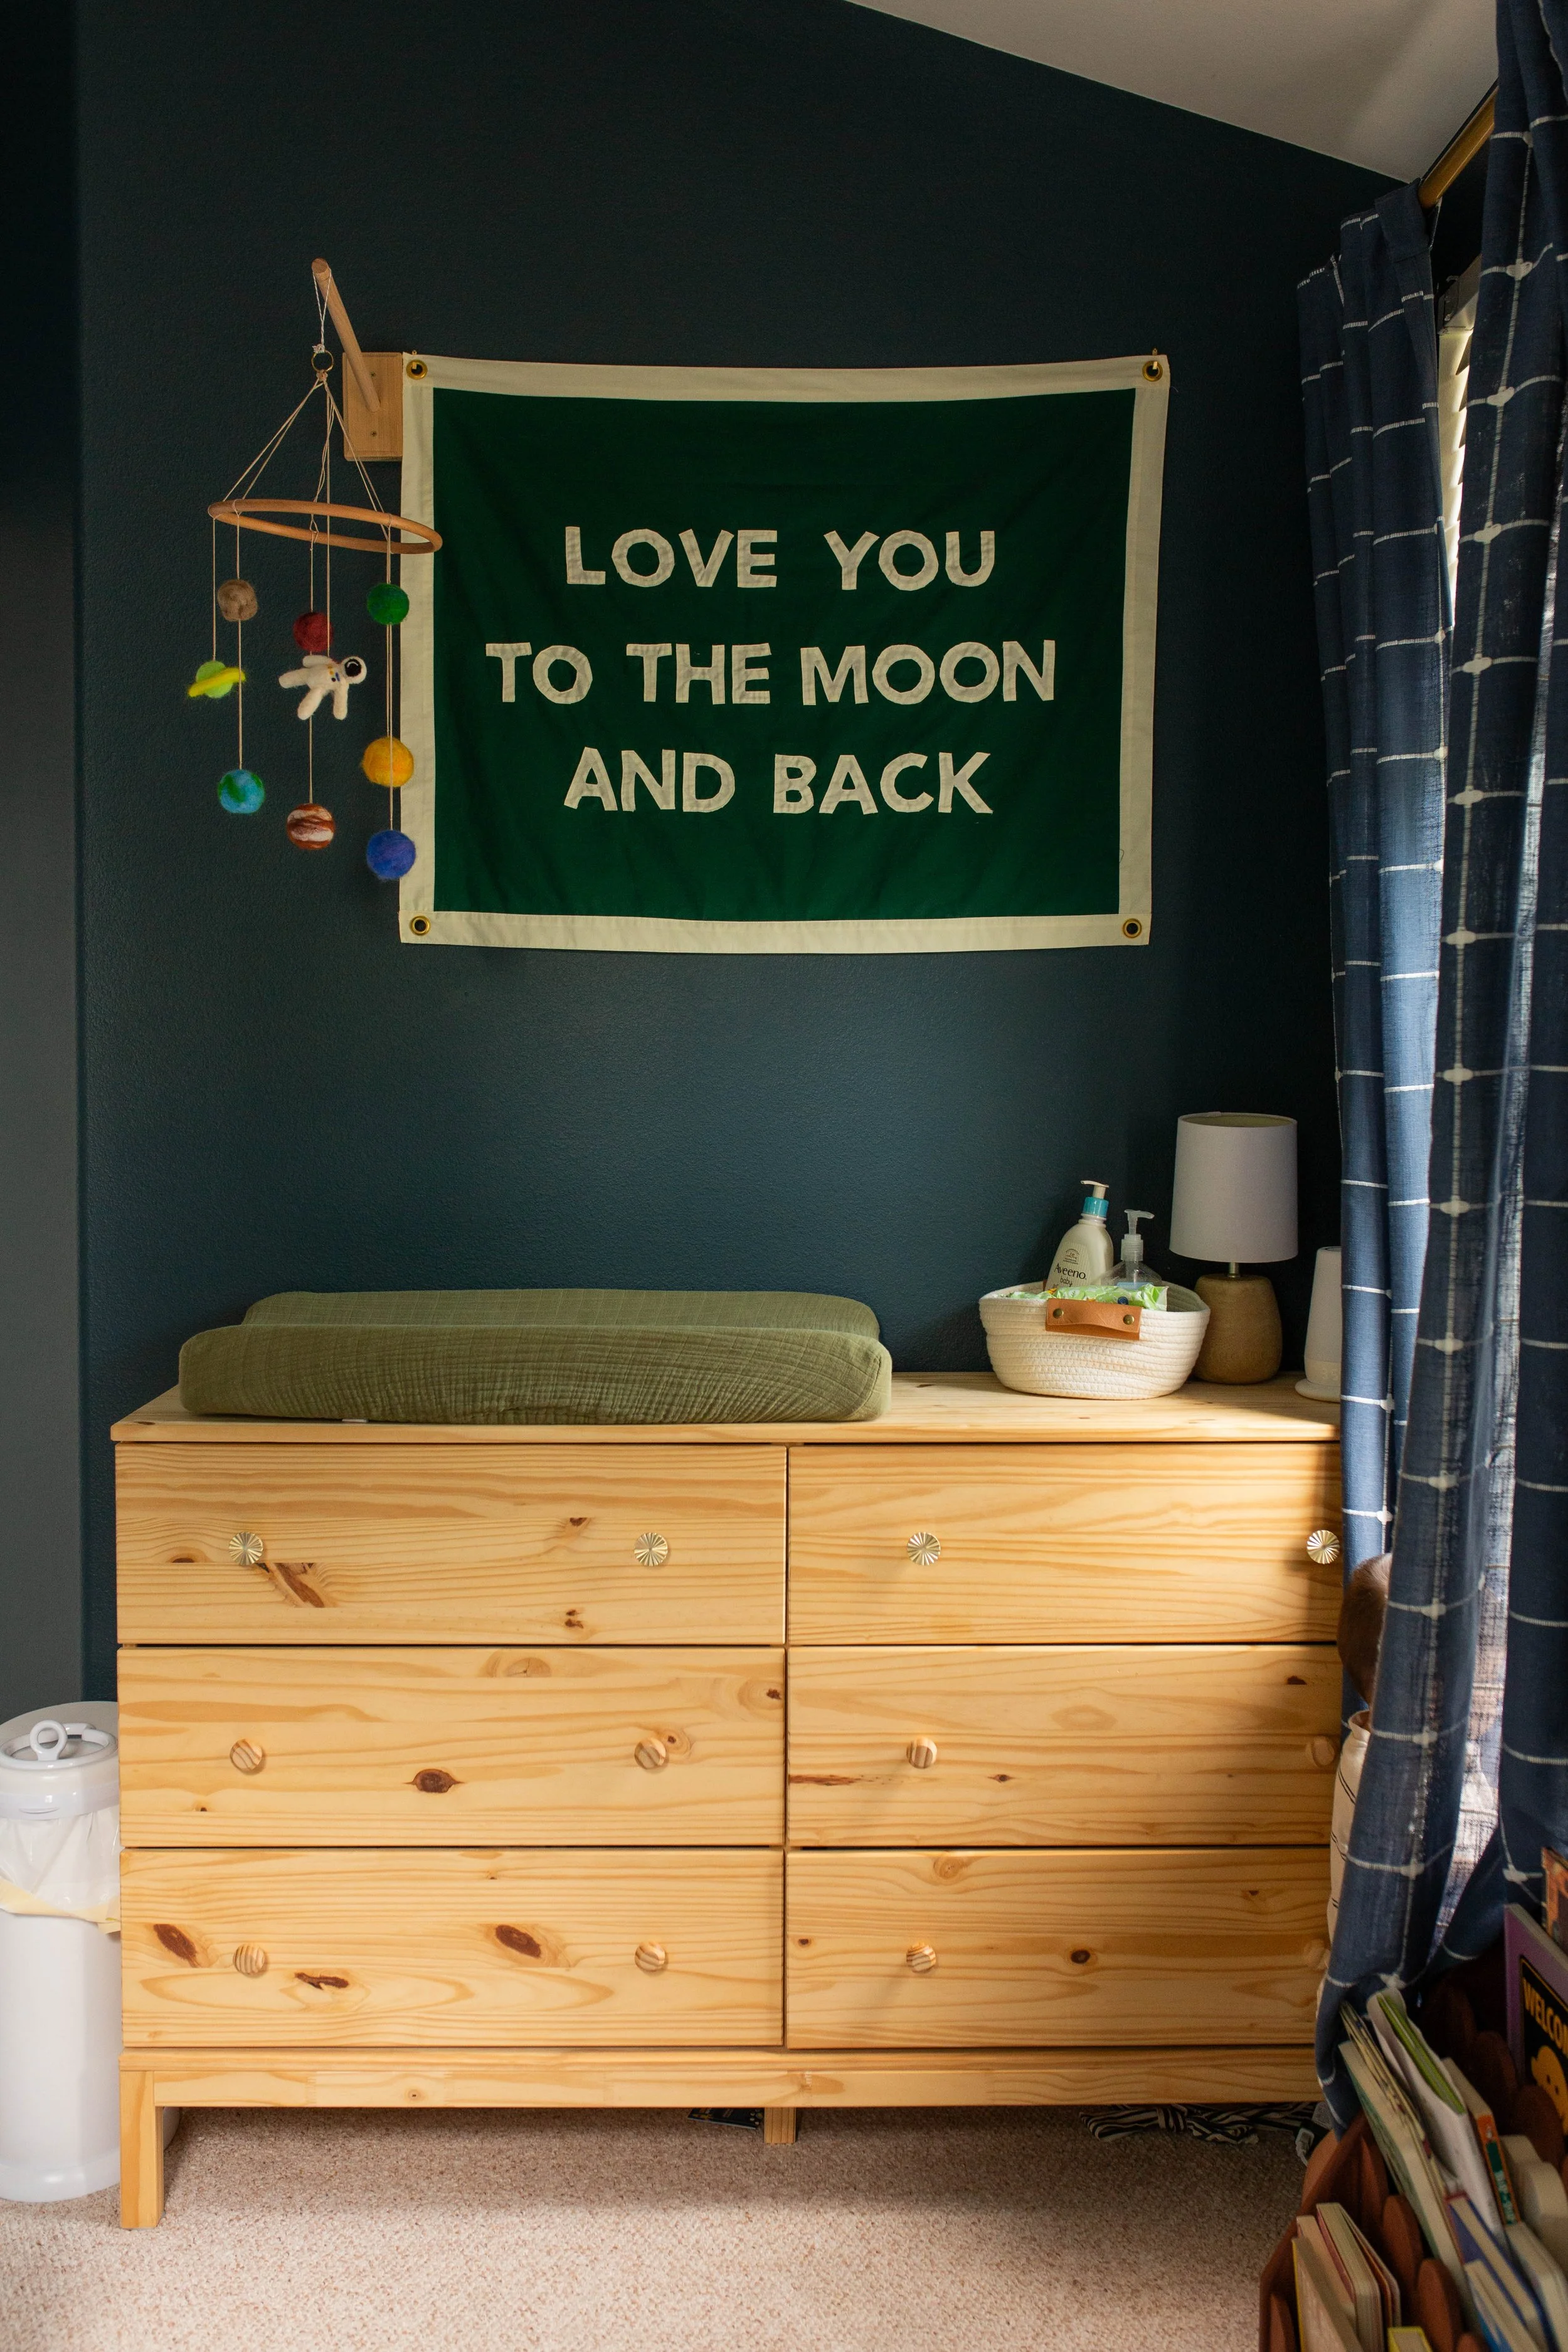
It’s just a cotton rectangle, with a cotton border, cotton letters top stitched onto it, and grommets added to the corners. I think the grommets are what make it feel really professional vs DIY and they weren’t difficult, though it did require some muscle. This is the grommet kit I purchased. I watched some tutorials on adding grommets but I ended up just kind of doing my own thing — cutting a hole with scissors and using a rubber mallet to pound the pieces together.
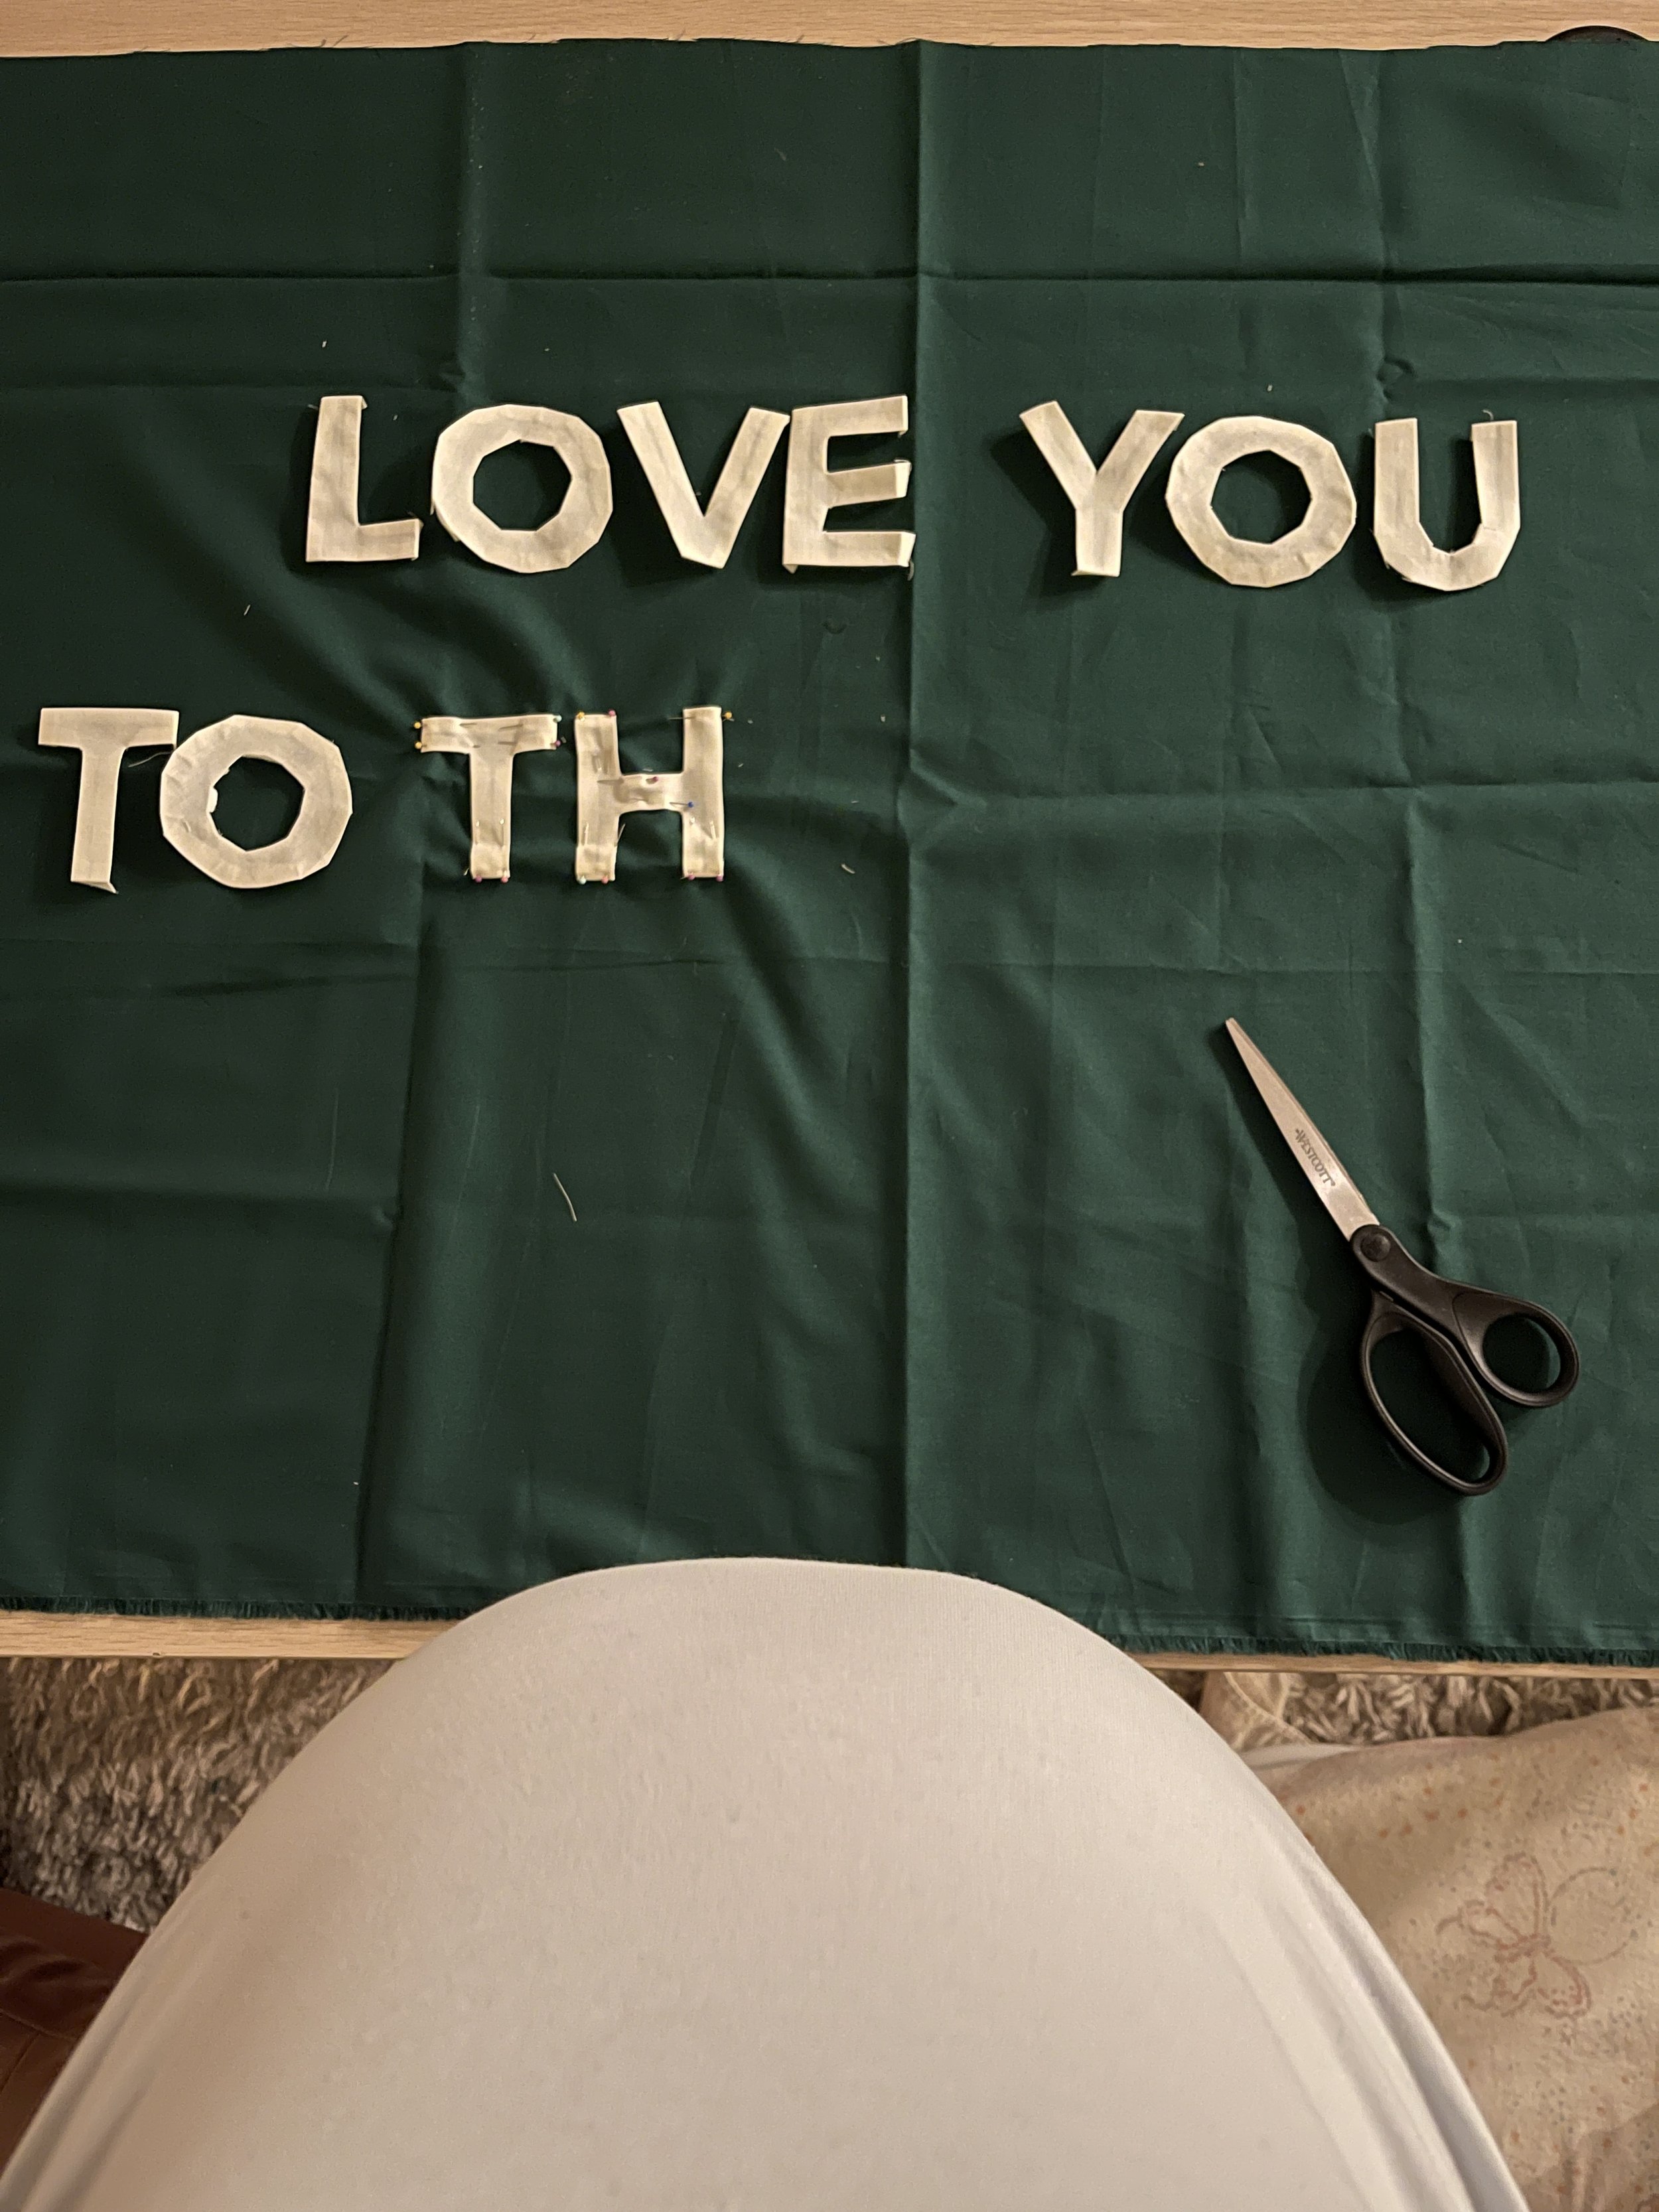
For the letters, I printed out the letters I needed in a nice large, bold font, cut them out of the paper and then used those as the pattern, adding 1/4 fabric around each edge to be the seam allowance. This was the trickiest part — folding a seam under on such complex shapes. One of my fashion designer friends suggested an easier way would be to serge the edges of the letters instead of folding them under, or just doing a zig zag stitch if you don’t have a serger. I considered this too but felt like it was worth it to fold under since I had already started and was loving the look!
The border I added just like you would with a quilt binding — You can also buy these pre-made, but it’s basically a 4 inch strip of fabric, fold the edges into the middle (and press with an iron!), and then fold it in half, so you’re left with a 1 inch strip (4 layers deep). Then I laid that around the edges and top stitched right up close to the inner edge, again, just like you would when quilting.
For the corners, since it was as flag, I liked the look of having the bottom and top border visibly on top of the side border, so I did the sides first and then the top and bottom (differently than I would normally quilt where you try to make the corners more seamless).
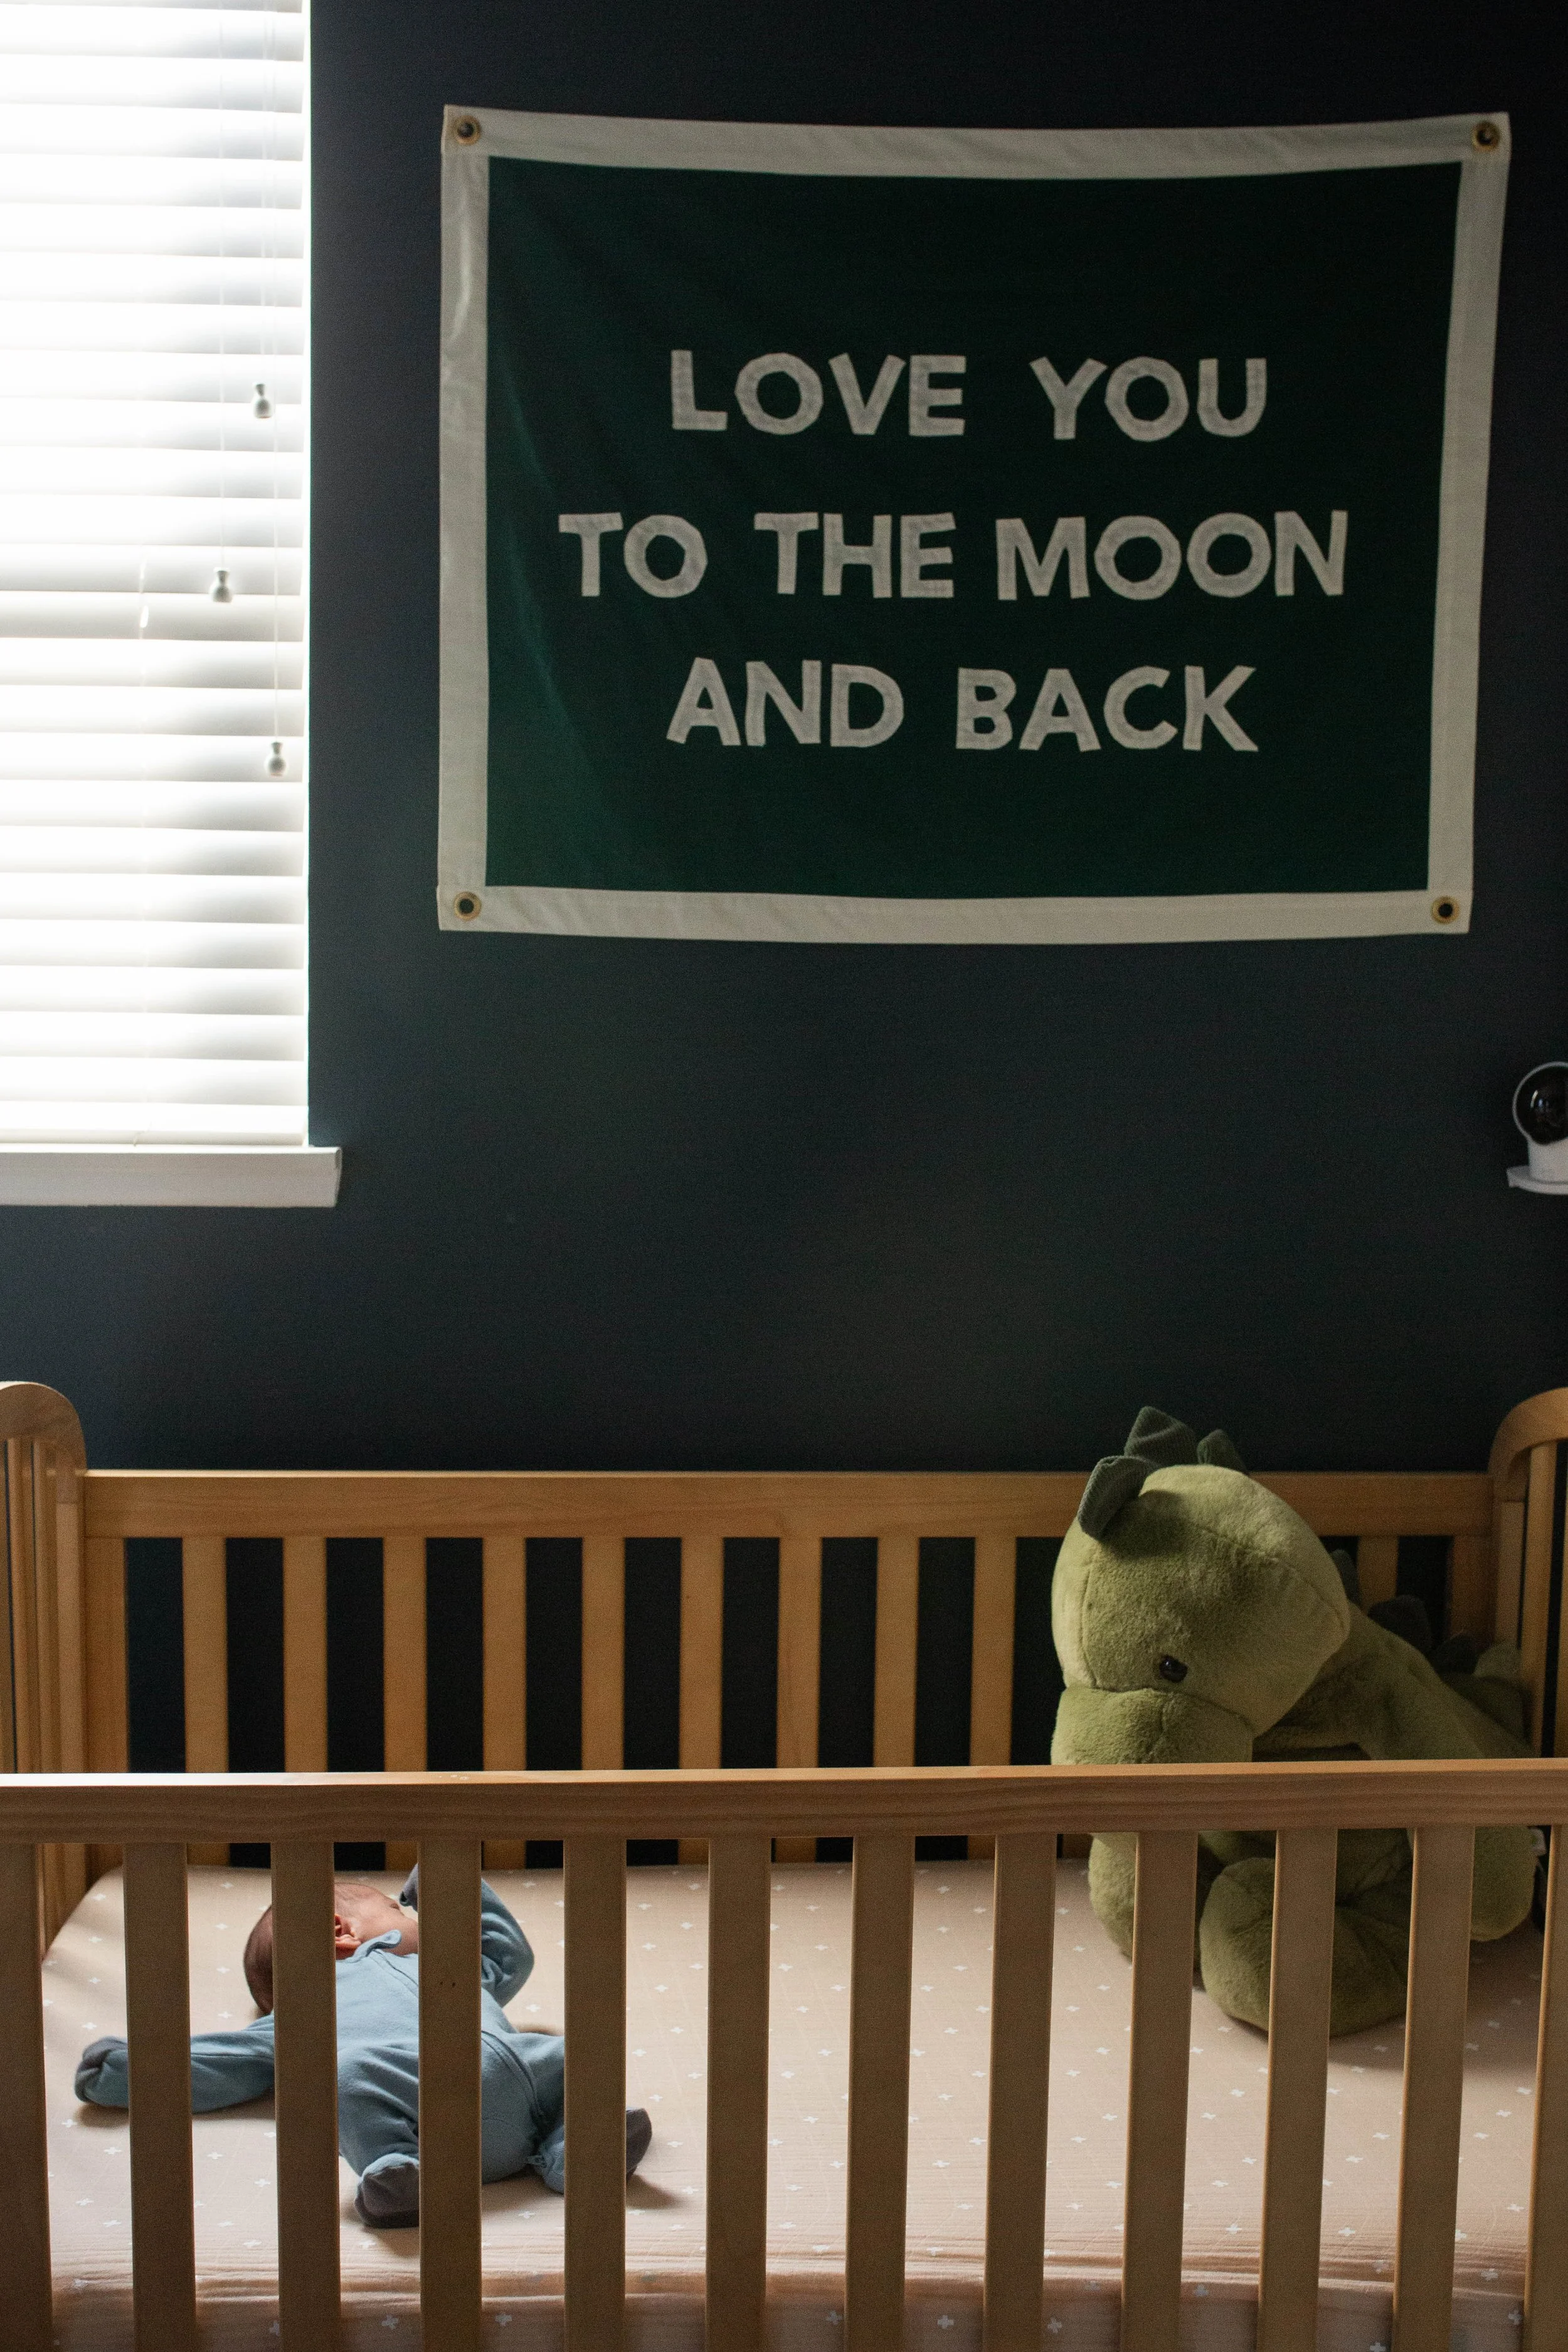
And the quote on it, “Love you to the moon and back” is of course inspired by the book “Guess How Much I Love You,” and fit in perfectly with our outer space theme for his room.
I wish I had more excuses to make flags because this was such a fun one!